Restaining a wood door is easy to give your home a facelift. If you’re looking for a quick, affordable way to spruce up the look of your front door, restaining is an excellent option. But how exactly do you go about it?
In this blog post, we’ll explore the steps involved in restaining a wood door without stripping.
Tools Required To Restain A Wood Door
- Safety goggles
- Rubber gloves
- Paint stripper
- Paintbrush
- Old clothes or rags
- Sandpaper
- New stain
- Polyurethane (optional)
1. Cleaning and Preparing the Door
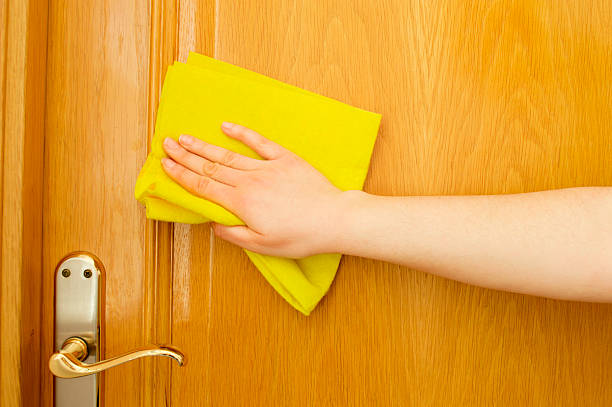
The first step in restaining is the cleaning and prepping the surface of the wood. You should start by wiping down the entire door with a damp cloth or sponge, making sure to get rid of any dirt and dust that has accumulated over time. Then, use sandpaper to remove any existing finish or paint on the door.
Be sure to use fine-grit sandpaper so as not to damage the wood underneath. Finally, wipe down the entire surface again with a damp cloth or sponge before moving on to the next step.
Related Topic: How To Clean A Wood Door?
2. Applying Stain and Finish
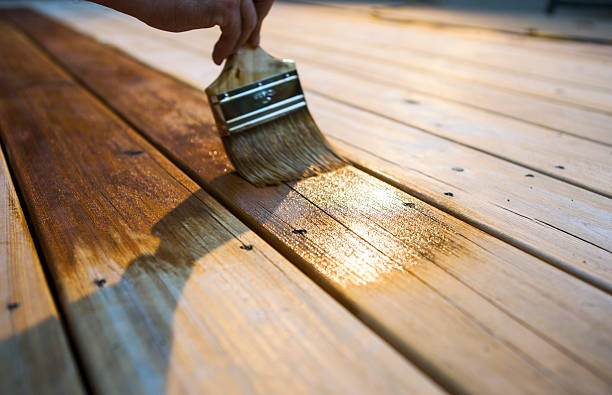
Once your door is clean and prepped, it’s time to apply stain and finish. When selecting which type of stain and finish to use for your project, be sure to choose one that’s specifically designed for exterior doors and provides UV protection from fading due to sunlight exposure.
Apply two coats of stain with a brush or rag allowing each coat ample time to dry before applying the next and then finish off with two coats of sealer/finish using either an aerosol can or brush/rag technique (whichever you prefer).
Be sure to follow directions provided by the manufacturer carefully when applying sealer/finish as improper application may cause damage or discoloration over time.
3. Final Touches
Once both coats of stain and sealant have been applied, all that’s left is some final touches! Wipe away any excess residue from around your newly stained door using a clean cloth; then inspect for any imperfections that may need attention such as drips or runs in either coat of stain/sealer.
Finally, allow ample drying time before replacing hardware (such as hinges) back onto your newly refreshed wood door!
How to Restain A Door Without Removing It?
Begin by wiping down the entire surface of the door with a damp cloth and some mild soap. Make sure that all dirt and dust are removed before you begin staining. Allow the door to dry completely before proceeding to the next step.
Once the door is dry, use painter’s tape or masking tape to protect any areas around the edges of the door that you do not want to be stained (such as walls or floors). This will keep them from getting stained as you apply the stain to the door itself.
Now it’s time to start staining! Working in small sections, take your brush and apply a thin layer of stain onto each section of the door. Be sure that you are working in well-ventilated areas when applying your stain; never work indoors with no windows open!
Once one section is done, move on to another until all sides of your door have been stained. Allow each side at least 15 minutes to dry before turning over your door and staining on the other side.
Staining wood door without removing old stain
Refinishing furniture can be a challenging task, but luckily it is possible to stain wood without removing old stains! The trick to this is applying a chemistry known as “shellacking,” which soaks into the wood and creates a primer perfect for the new layer of stain.
This process is relatively simple and requires very little stripping down or sanding of the surface. Shellacking will preserve the original finish while creating an ideal base for the new coat of stain.
It’s important to remember that shellacking isn’t simply painting over the old stain – instead, it is meant to complement and enhance it!
Overall, staining wood without removing old stains is definitely possible if you utilize shellacking as your method of preparation.
Related Topic: How To Make A Metal Door Look Like Wood?
Conclusion
With just three simple steps clean & prep, apply stain & finish, and final touches restaining your wood door can be an easy DIY weekend project that will leave you feeling proud at having completed it yourself!
No need for expensive contractors or chemicals; all you need is some elbow grease and patience! Give it a try today and see just how rewarding revitalizing old surfaces can be!
FAQs
Do you have to sand a door before restaining?
Sanding a door before restaining is an important step in preparing it for the new finish. A good, thorough sanding will help ensure that the new stain adheres properly to the wood and creates a durable, beautiful, and long-lasting look on your door.
Not every type of door requires a complete sand-down before being stained, though; if the door has been varnished or already stained previously then usually just light sanding with a fine grit paper is enough to rough up the surface so that the new product will stick properly.
However, if you are dealing with an unfinished or raw wood door then a more intensive sanding process may be necessary. So if you’re planning on restaining your door make sure you know what kind of work it needs beforehand!
Can you stain a door while it’s hanging?
Staining a door while it is hanging can be done when you possess the right tools. First, make sure your workspace is prepped as you would need protection from any dripping of stain or varnish. To avoid mess, secure drop cloths over the floor and walls of the room.
Begin staining from the top door panel and move in horizontal strokes downwards. Be sure to use even strokes or else streak marks may form on your door’s surface. Allow for even drying time for each panel before you move on to the next one, typically around 30 minutes.
After this process, apply more coats as per your project requirement before rehanging the door!
Related Topic: How To Fix A Hole in A Wood Door?
What is the fastest way to sand a door?
The best way to sand it quickly and efficiently is with an electric sander. Electric sanders offer much faster results than traditional paper and block sanders, but care needs to be taken when using them as they can leave unsightly swirl marks.
For the best finish, use a coarse 40-grit for initial sanding then progress to finer grits for the final touch. Always wear safety goggles when using an electric sander.
Is it better to apply the stain with a brush or roller?
When it comes to applying a wood stain, both a brush and roller can get the job done. While rollers can be used to apply even layers of stain quickly and efficiently, brushes have better control when trying to access tight corners or intricate details on the wood. It really depends on your project and its needs; consider the size, shape, and level of detail before deciding which tool is best for you.
How many coats of stain do I need for a door?
Typically two coats of stain are required for a consistently even finish. One coat might be enough if it’s been properly sanded, with any imperfections filled in beforehand. For a deeper color and longer-lasting protection against the elements, however, more than two applications may be necessary.
Take the time to properly plan and prepare before applying any coats of stain to ensure a flawless result!